 how-to
Can You Replace a Sink Without a Plumber?
Last Updated: October 29, 2026
Quick Summary
Yes, you can replace a sink without a plumber when your plumbing is sound and you're swapping like for like. The job stops being DIY the moment supply lines are corroded, the countertop needs cutting, or the new basin doesn't match the old cutout.
- Drop-in sinks are the most forgiving DIY swap; undermount sinks bonded to stone are a different job.
- If you answer no or unsure to more than two checklist questions, call a licensed plumber.
- Shut off both valves, open the faucet to drain pressure, then place a bucket under the P-trap.
- Set the new sink dry first to confirm fit, then apply a continuous bead of silicone caulk.
- New braided stainless supply lines cost roughly $15 to $40 per pair.
Table of Contents
- Can You Replace a Sink Without a Plumber?
- Sink Installation Tools You Will Need
- How to Disconnect Sink Plumbing Safely
- Removing the Old Sink and Preparing the Cutout
- Installing and Securing the Replacement Sink
- Undermount Sink Replacement: What Changes
- Leak Testing and Troubleshooting Common Problems
- Plumber Sink Replacement Cost and When to Call UMark
- Frequently Asked Questions
Can You Replace a Sink Without a Plumber?
Yes, you can replace a sink without a plumber in many cases, and plenty of homeowners in North York do exactly that. The job is realistic when your plumbing is sound and you're swapping like for like. It stops being a weekend project the moment supply lines are corroded, the countertop needs cutting, or the new basin doesn't match the old cutout.
This guide walks you through the job, from shutoff valve to leak test, and explains when to put the wrench down and call a licensed plumber.
Here's the short version. A sink replacement is a plumbing fixture swap: you disconnect the water supply lines and drain, lift out the old basin, set the new one, and reconnect everything watertight. Most of the work is patience, not skill.
A handful of factors can help you decide whether a sink replacement is a DIY project. Use this checklist before you buy a replacement sink.
DIY Eligibility Checklist
Work through these questions honestly. If you answer "no" or "unsure" to more than two, plan to call a licensed plumber.
- Sink type: Is it a drop-in (top-mount) sink? Drop-in models are the most forgiving DIY swap. Undermount sinks bonded to stone or quartz are a different job entirely.
- Shutoff valves: Do both valves under the sink turn freely and stop the water completely? Seized or weeping valves are a common reason a simple swap becomes a repair.
- Supply lines: Are the existing braided or copper lines in good condition, with no corrosion at the fittings? If they're brittle or crusted, replace them as part of the job.
- Drain and P-trap: Does the existing drain line line up with the new sink's drain outlet? A mismatched drain height may require reworking the trap arm.
- Countertop condition: Is the cutout solid, dry, and free of cracks or swollen particleboard? Water damage around the rim needs to be addressed before a new sink goes in.
- Cutout compatibility: Does the new sink's template match the existing hole? A drop-in sink needs a cutout slightly smaller than its rim. If the new basin is smaller than the old hole, you have a compatibility problem, not an installation problem.
- Cabinet access: Can you comfortably reach the mounting clips and connections from inside the cabinet? Tight access slows the job and increases the chance of a cross-threaded fitting.
When Local Rules Matter
If you're unsure whether your project requires a permit, check with your local building department before you start.
Get those factors right and the rest is methodical. Below are steps for working through the job.
Sink Installation Tools You Will Need
Gather these sink installation tools before you start. Gather these tools before you start.
Basic kit:
- Adjustable wrench and a basin wrench for tight spaces
- Bucket and old towels for trapped water
- Utility knife and putty knife
- Silicone caulk and plumber's tape
- New supply lines and a new P-trap if the old ones are worn
Worth having on hand:
- Plumber's putty for the drain assembly
- Mounting clips and sink supports for the new basin
- A level to check the sink sits flat
- Safety glasses if you're working under the cabinet
How to Disconnect Sink Plumbing Safely
Learning how to disconnect sink plumbing safely starts with one rule: water off, pressure gone, then tools out.
- Shut off the water. Turn both shutoff valves under the sink clockwise until they stop. If they're stiff or corroded, don't force them.
- Open the faucet. Run the tap to drain pressure from the lines.
- Place the bucket. Set it under the P-trap before you loosen anything.
- Disconnect the supply lines. Use the adjustable wrench on the nuts at the valve and the faucet tailpiece.
- Remove the P-trap. Loosen the slip nuts by hand where you can.
Watch out: if a shutoff valve won't close fully or starts weeping when you touch it, stop. That valve needs replacing, and that's a job for a licensed plumber.
Removing the Old Sink and Preparing the Cutout
Removal is straightforward once the plumbing is free. Cut the silicone sealant around the rim with a utility knife, then work the putty knife under the edge. Lift the basin out slowly and check its weight with a helper.
Now inspect the sink cutout in the countertop. Clean off old caulk and putty. Check for soft or swollen particleboard, cracks, or water damage around the rim. Any of those need attention before a new sink goes in.
Measure the cutout and compare it to your new sink's template. A drop-in sink needs the cutout slightly smaller than the sink rim. If the new basin is smaller than the old hole, you have a compatibility problem, not an installation problem.
Installing and Securing the Replacement Sink
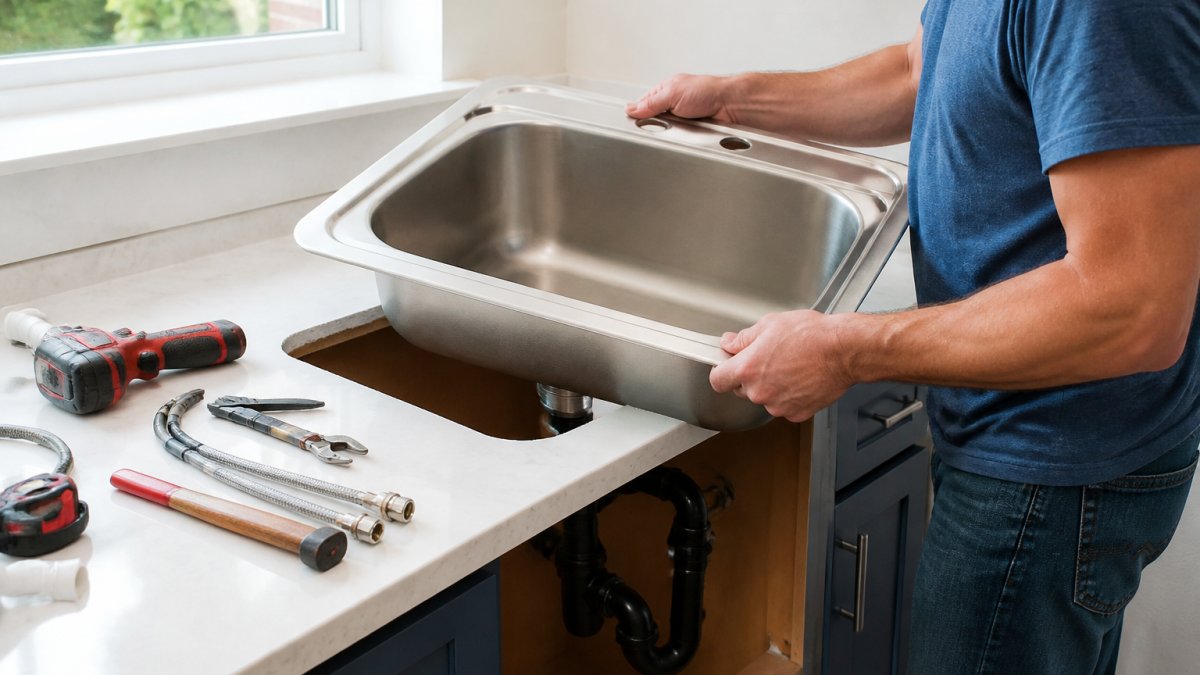
Set the new sink dry first, with no caulk, to confirm the fit. Then lift it out and run a continuous bead of silicone caulk around the rim.
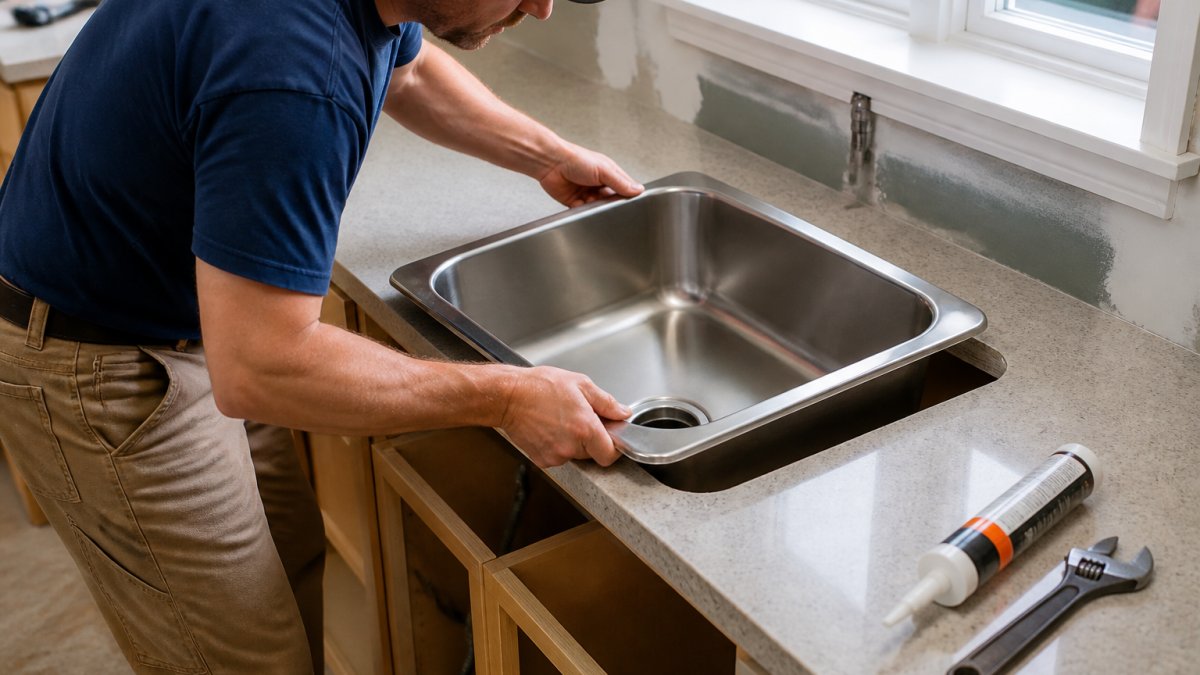
Lower the sink into place and press down evenly. Tighten the mounting clips from underneath, alternating sides like wheel nuts so the sink seats flat. Don't overtighten; you'll crack the rim or squeeze out all the sealant.
Wipe away excess caulk while it's wet. Let the sealant cure before you run water, usually overnight.
Undermount Sink Replacement: What Changes
Undermount sink replacement is where DIY usually ends. An undermount sink hangs below the counter, held by clips or a mounting rail bonded to the underside of stone.
The hard part isn't the plumbing. It's the bond. If the old sink is glued to granite or quartz, removing it without chipping the stone takes care. Re-bonding a new one needs the right adhesive and proper support.
Replacing an undermount sink under natural stone may require professional help.
Leak Testing and Troubleshooting Common Problems
Test for leaks before you put anything back in the cabinet. Run water at the faucet, then fill the basin and drain it while you watch every connection with a flashlight.
- Drip at a supply line: tighten the nut a quarter turn, or add plumber's tape.
- Leak at the drain: reseat the putty or gasket under the strainer.
- Water pooling at the rim: the caulk bead has a gap; reseal it.
- Slow drain or gurgle: the P-trap or vent may be partly blocked.
If problems keep coming back, recurring clogs often point to a deeper issue. Our guide on recurring bathroom sink clogs explains the causes. For older homes, fixing gurgling sink drains walks through the drain and vent checks step by step.
Plumber Sink Replacement Cost and When to Call UMark
Consider calling a licensed plumber if any of these apply:
- A shutoff valve won't close or is corroded
- The new sink doesn't match the existing cutout
- You have an undermount sink under stone
- You see water damage or soft cabinet floors
- The drain or vent keeps backing up
- You need to relocate the drain or supply lines
DIY vs. Hiring: A Realistic Cost Picture
Sink replacement costs depend on sink type, cabinet access, and whether valves or drain parts need replacing. You can compare the two paths when building a budget.
DIY material costs (typical range in the North York area):
- Replacement drop-in sink: varies widely by material and brand; budget models start in the low hundreds of dollars, while stainless and composite models climb from there.
- New supply lines (braided stainless): roughly $15-$40 per pair.
- New P-trap kit: roughly $15-$35.
- Silicone caulk and plumber's tape: under $20 combined.
- New shutoff valves (if needed): roughly $15-$30 each.
- Basin wrench (if you don't own one): roughly $20-$40.
Material costs depend on the sink and any parts that need replacing.
Hiring a plumber:
Getting a Clear Estimate
If you're weighing DIY against hiring, our guide on what plumber time actually costs helps you compare. And when you're ready to hire, here's how to find and vet a plumber near you.
Here are the typical DIY material costs the article lists for a sink replacement in the North York area.
| Item | Typical cost | Note |
|---|---|---|
| Replacement drop-in sink | Varies widely by material and brand | Budget models start in the low hundreds |
| New supply lines (braided stainless) | Roughly $15-$40 per pair | Replace if brittle or crusted |
| New P-trap kit | Roughly $15-$35 | Needed if old trap is worn |
| Silicone caulk and plumber's tape | Under $20 combined | For sealing the rim |
| New shutoff valves (if needed) | Roughly $15-$30 each | Budget quarter-turn valves for older homes |
| Basin wrench (if you don't own one) | Roughly $20-$40 | For tight spaces under the sink |
Frequently Asked Questions
Do I need a plumber to replace a sink?
Not always. A like-for-like swap of a drop-in sink with the same dimensions and existing supply lines is a realistic DIY job. You will need to shut off the valves, disconnect the plumbing, remove the old basin, set the new one in sealant, and reconnect the drain and supply lines. Consider hiring a plumber when the new sink has a different footprint, when you are replacing an undermount model, or when the shutoff valves and pipes are corroded.
What tools do I need to replace a sink?
The core sink installation tools are an adjustable wrench, a basin wrench for tight faucet nuts, a putty knife, a utility knife, a bucket and rags, plumber's tape, silicone caulk, and a drain assembly with strainer. Add mounting clips or sink supports for an undermount model, and a level to confirm the rim sits flat. A headlamp helps in the cabinet, and a second person makes lifting a cast-iron or fireclay basin safer.
Can you replace an undermount sink without replacing the countertop?
Sometimes, but it depends on the cutout and how the old sink was bonded. Undermount sink replacement usually means cutting through the silicone or adhesive that holds the basin to the underside of the stone, then cleaning the rim before the new sink is supported and sealed. If the new sink's flange does not cover the old adhesive line, or the countertop edge is chipped, a fabricator may need to re-polish or adjust the opening.
How much should a plumber charge to replace a sink?
Plumber sink replacement cost in North York and Vaughan depends on the sink type, whether the countertop opening needs adjustment, and whether the shutoff valves or drain lines must be updated. Check UMark Plumbing and Drain Inc.'s website for current pricing or request a quote.
Replacing a sink yourself is doable, until one stubborn valve or an undermount bond turns it into a bigger job. At UMark Plumbing and Drain Inc., we've handled sink and fixture work across North York and the surrounding area for over 20 years, with a certified team available 24/7 for emergencies. We provide clear estimates up front, so you know the cost before we start. Get started with UMark Plumbing and Drain Inc. and get your sink replaced without the guesswork.